Now record your computer screen in Windows 10


Now record your computer screen without using any third party tools, record your screen as video using inbuilt Xbox app in windows10. 
 
Windows 10's Xbox app records video games and just about everything else.Windows 10 has a native feature that lets you record a video clip -- of up to 2 hours -- of your screen. But you may not have noticed this feature, because it's hidden away inside the Xbox app.
 
 
Hit the Windows key and G, and a popup will appear asking if you would like to open Game bar -- there are no Yes and No buttons, but check the 'Yes, this is a game' box (you will have to do this the first time you access the screen recorder in any application). 
 
Once the recording is finished press the stop button and search for the video file in 'Videos' folder in 'My Documents', now why to use third party apps for your screen recording? explore the new feature in Windows 10 by just pressing Ctrl+F5.

Try it now...

How to Use Google Maps Offline


Yes you can use Google maps Offline. you can keep specific location map saved in your phone. Simply follow these steps...

1. Ensure Internet is switched ON.

2. Open the Google Maps app maps.

3. Search for a place, like "New Delhi".

4. At the bottom of the search there will be Save a new Offline Map option, Click on that otherwise in the search bar itself type ok maps or say ok maps by pressing the microphone icon in the search bar.


5. Now Give a name to the map and now it will be saved and you can access the map offline. swich OFF the internet and Access the main menu and select Your Places and click on the saved map.


Limitations

There are some limitations to the functionality of the offline maps, mostly regarding the size of the location you’re looking for. For example, New Delhi and surrounding areas would be a bit too much for just one cached file and you will receive a message saying it can't be saved. In this scenario, it would need to be broken into smaller, surrounding areas. Also, offline navigation is not available, nor is the ability to conduct a search within the offline map file. The maps you download will be stored for thirty days and after this they are automatically deleted, so don't presume they will last forever.

How to download youtube videos without any softwares ?


How to download youtube videos without any software? Follow these simple steps...

Step 1 : Go to https://www.youtube.com

Step 2 : Select your video and copy the video url. (example : https://www.youtube.com/watch?v=vdB-8eLEW8g)

Step 3 : open a new tab and paste the video url in the address bar and add 'ss' in the url as given.

https://www.ssyoutube.com/watch?v=vdB-8eLEW8g


Step 4 : By pressing enter key a new page will appear and it will show a download option with available video formats.


How can i download videos from Facebook ?? Are you with the same Question?

download videos from Facebook

There is an easy step to download videos from Facebook Try it.


Step 1 : Login to your facebook account.

Step 2 : Click on any one video and right click on the video, normally any download option will not be there wont get disappointed try the another step.

Step 3 : In the address bar ( where you will type the site address), just prefix a m. in the url and press enter. (https://m.facebook.com/)

Step 4 : Now try playing the video and right click on that video you can see an option save video, simply click on it and download the video. 

In mobile browser you can long press on the video and can have the same option.

Is it nice? Working ?


Essential Browser Addons you should use.


Here are some essential add-on you should use in your day to day usage, add-ons are the additional programs that are used to do some specific actions in your browser. In my experience i would like to share some of them, that may be helpful to you too. I expect your suggestions for improving the user experience.  

I heard about it add-ons, what is it actually?

Add-on is the general term for what enhances an application. It comprises snap-in, plug-in, theme and skin. An extension add-on tailors the core features of an application by adding an optional module, whereas a plug-in add-on would tailor the outer layers of an application to personalize functionality.

Why should i use add-ons ?

It brings ease of access to certain functionalities. lots and lots of add-ons are available with the browser you use, make use of it and enjoy the ease. for example i want to download a video from you tube most of the people will go for you tube video download software and copy the video url and paste it in the software then it will ask for a licensed version so you will click cancel and avoid downloading the thing, some people will try several times and download the video. Why do such things install an addon in your browser and in the below of the video itself you will get the download option.

i would like to share some of the addons like this keep reading.


This is an easy YouTube Video Downloader - If all you need is a simple, intuitive, and non-intrusive Add-On to download YouTube videos, this is the Add-On for you.


Capture the whole page or any portion, annotate it with rectangles, circles, arrows, lines and text, blur sensitive info, one-click upload to share. And more!

3. ColorZilla (Mostly for web developers)

Advanced Eyedropper, Color Picker, Gradient Generator and other colorful goodies.

4. Firebug (Mostly for web developers)

Firebug integrates with Firefox to put a wealth of development tools at your fingertips while you browse. You can edit, debug, and monitor CSS, HTML, and JavaScript live in any web page. 

Start trying these... 

How to Run Ubuntu from Pendrive


There is a good news for you.. Don't waste your disk space for loading an extra operating system in your computer and avoid problems related to partitioning. You can load any version of Ubuntu operating system from your pen drive(thumb drive). Just plug in your Ubuntu loaded pen drive and boot from it, sounds great right? Then go through the following steps to make it happen.


Step 1 : Download the latest version of Ubuntu operating system from the official Ubuntu page Download Latest Ubuntu. I you have a downloaded .iso version then don't look inti it.

Step 2 : Next we want the pen drive to become bootable for that Download Universal USB Installer software and install in your windows system. Now its simple our job is over now its machine's work to make it done for us.


Step 3 : Open Universal USB Installer and choose the Ubuntu version you have with you. If its not listed in it don't worry just choose the Ubuntu option and locate your downloaded ISO file. it may look like ubuntu-amd-64.iso or some thing like that and select your pen drive as source then click OK.


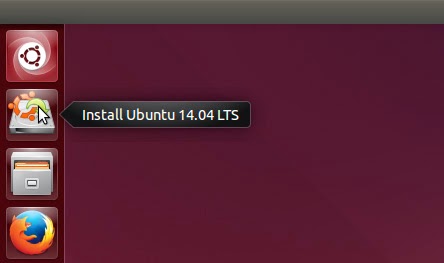
Step 4 : Follow the instructions and wait until it completes. Then restart your system and enter into Boot Device Selection Menu. There are some specific keys to do so and it may differ according to the System you are using. Commonly F8, F10, Escape Keys are used. In the Boot device selection Menu your pen drive Drive letter will be shown and select that option and press Enter. Now Operating system will Load from your Pen drive. There will be two options available for you Install Ubuntu and Try Ubuntu Simply select try Ubuntu and start working on it. Is it simple ?


Note : Use At least 4GB Pen drive.


WAMP SERVER Installation Error MSVRCR100.dll is missing.

I have encountered a problem while installing WAMP Server on my PC, it shows an error message saying that 'MSVCRC100.dll Missing and exits the installation and the WAMP icon stays offile. How it can be solved?? Try what i have done and send your feedback.

The problem is due to the absence of supporting Visual C++ files. When the installation of
Microsoft Visual C++ 2010 SP1 Redistributable Package is over the problem will be resolved.


STEP 1 : Uninstall the WAMP Server you have installed. Then restart the system.

STEP 2 : Download Microsoft Visual C++ 2010 SP1 Redistributable Package from Microsoft website. Here is the link for you.


STEP 3 : After downloading and installing the file restart your system and install WAMP Server again.

STEP 4 : Hope the problem will be solved the error messages are vanished and the WAMP icon gone Green Like your face.

NOTE : Some times skype will be the path blocker for you during these steps, i recommend don't use skype during these time and quite skype process by simply right clicking on the skype icon and choose 'Quite Skype '. This is why because both applications use same communication ports on your system. Is this content is helpful for you ??

Security Exceptions


 You may be sometimes faced such security exceptions while logging into your mail server or any other relevant websites. Most of the people will think that it will be the problem of the browser or the net and at last you will go for computer issue and call service provider and he will make it correct actually what is the real issue???

 Your computer time and date will be set to default due to CMOS battery fault.


 In such a system when you try to log in it will show such untrusted connection warning to avoid this temporarily just click in the 'I Understand the risk' and in the next window click on the Get certificate button and click Confirm security Exception button.

By doing so the exceptions are temporarily stopped and with using that certificate can log into that site multiple times. To get a permanent solution replace the CMOS battery of your system.
This small battery is used to store the initial settings of the system and time which you set, collectively it is called as BIOS(Basic Input Output Settings).

This information may be known for people who are all more attached with the system otherwise try to understand your computer's basic problems like this.   

Manual Disk Partitioning

Partitioning of a disk means dividing the available Hard Disk space into multiple categorized sizes. If there are five partitions means there is not five individual disks, a whole Hard Disk is portioned into multiple partitions or drives. An application called partition manager helps the user to partition the disk manually.

How to access Partition Manager or Disk Manager ?

1. Right click on My Computer, click on Manage. A new window will appear from that choose Disk Management. Otherwise goto run and type diskpart.


2. With using Disk Management tool user can add, delete partitions.

How to make Disk Partitions ?

1. Right click on the Free space( Unallocated space) and choose New Simple volume.


2. Choose the drive letter and assign the disk space in MB. 1024 MB=1 GB.

3. Click next and format the partition. now a new drive will be aviliable for you.

NOTE: Donot format or delete a drive with content.

Partition During Windows Installation

During the windows installation time normally creation of 3 Disk partitions are allowed. for creating more than of that partitions users can use manual disk partitioning.


Windows 7 Program Compatibility

WINDOWS 7 COMPATIBILITY

Windows 7 Application compatibility helps the users to run the applications using the settings of other windows platforms. For example if i want to run an application in Windows 7 operating system but that will only run in a platform that is other than Windows 7 (Example:Windows Xp). These kinds of compatibility issues can be resolved using Windows 7 Program Compatibility Wizard. Lets see the steps needed...

Step 1: Right click on the application exe or installation file of the application and click on Troubleshoot Compatibility option.


Step 2: Select troubleshoot the program and it will search for the problems.


Step 3: Now select the option “ The program worked in earlier version of windows but won’t install or run now” and click next.


Step 4: Now it will show a list of operating systems, choose one that the application has worked earlier and click next.


Step 5: Now click on “Start the program” button. In the next popup window choose save settings if the program has executed successfully.


Internet Browsing Tips

Sharing some important tips that will be help-full in browsing the web, not just brows the internet do it intelligently.

Many of the internet users uses the features well but their is some important things that should be taken into consideration when you are providing your important identity.

Experience these browsing tips to brows the web much easier and ensure security.

1.Enclose the search keyword with double quotes.

Instead of giving the search keyword as it is enclose it with double quotes.

example : "internet and daily life".


2. Optimize the search keyword according to the user needs.

Enter the search keyword according to what kind of result the user needs.

for example if the user needs a PDF document relating to the given keyword follow the below format.

"internet and daily life" filetype:ppt

it will easily return the ppt files related to the keyword. can use for other file formats like PDF,DOC like that..

3. Get Definitions for the search keyword.

Get the quick definition for the keyword by typing as follows in the browser.

Example : define: encapsulation.

4. Try to avoid toolbar.

5. Disable some applications automatic update.

Some software or applications will have automatic update, irrelevant updates cause slow internet for the user.

6. Instead of opening links in different windows try to open multiple links in multiple tabs.

In opening links in different window the browser application's different instances are created rather than that open multiple links in multiple tabs.


7. Make Bookmark list for mostly visiting sites.

By adding web address as bookmark user can easily access the site that a pop up list will help to directly move to that site.

8. Delete Temporary internet files.

This is the most important step that the previous browsing files will be a burden for the new browsing items so by deleting those items will provide visible difference in the browsing speed. Using disk cleanup temporary internet files can be deleted.


9. Use one of you browser as your default one.

Use one dedicated browser other than using multiple browsers it will produce multiple temp files and cookies.

10. Use one antivirus program.

One free antivirus program will at least block the virus attack and the user will get time to get out of it. i recommend Avira antivir a free antivirus program.( updates are required ).

11. Aware of key loggers.

Avoid hitting enter key while you logging into your accounts because if your system is attacked by virus or by key loggers they will place some scripts on to your browser and when the key press event is activated( when you press enter key) it will send the password to the hacker so be very careful of key loggers.

Some people will be laughing out by seeing this post that they will be having very faster internet connection or in other words by using the newer technologies the speed will never be a problem.

Anyway on that time also someone will be needing these tips...Hoping so...


Basics of computer hardware

BASICS OF COMPUTER HARDWARE
Basics of computer hardware includes the basic components of computer and its terms and terminologies.


CPU CABINET

CPU cabinets are the only containers of the hardware components of the computer, their are mainly two classifications of cabinets AT and ATX (came from AT and ATX class motherboards).

AT   - Created by IBM.
ATX- Created by Intel.

AT is an old method where the size is bigger and most ports are located at the back of the cabinet and power is directly connected to the board rather than to the switch, with this system will turn off but power supply will last until the user manually switches off.

ATX cabinets are cute and provides customization of ports and the power supplied through switches so power will be dropped automatically when the system is turned off.

AT 


ATX


SMPS(Switch Mode Power Supply)

Distributes the total power into required amount of power to each component of the computer.


Motherboard

An area where all the components are connected especially the processor.


RAM(Random Access Memory)

A primary memory where files are loaded when an application is executed its dependent files are loaded into the primary memory.

DDR(Double Data Rate)

According to the class of motherboard,capacity and speed RAM vary and new innovations are made..

DDR1


DDR2


DDR3

PCI(Peripheral Component Interconnect)

Enables the user to add extra cards which provides better facility and performance examples sound card,graphics card, TV turner card these enables extra memory allocated to them with the help of special driver software.

The main advantage of PCI is that if the on board functioning is stopped then the user can provide that functionality by adding the corresponding PCI card in the PCI slot of motherboard.

Example:- if a motherboard doesn't provides sound functionality then the user can add a sound card into the PCI slot with corresponding driver software and can enjoy the sound.


BIOS(Basic Input/Output System)

Consist of a set of programs which enables the user/Administrator to choose between the functionality of the computer. set of instructions that are maintained as the configuration of the system.

CMOS(Complementary Metal Oxide Semiconductor)

Which is used to save the changes made to the BIOS settings.

POST(Power On Self  Test)

Checking the hardware components status that they are ready for the processing and if everything is correct then loads the OS. Will return a beep sound from the system when it is switched on(if the on board speaker is connected).


C program downloads


1. Matrix multiplication : Reads two arrays from the user and assigns the result in another array and prints the array.   Download

2. Sub-string : Returns the sub string from a string.   Download

3. Student details using file : Reads student information from the user and writes to a file and reads data from the file and prints the data.   Download

4. String length using pointer : Finds the length of the string using pointer.   Download

5. String length : Finds the string length.   Download

6. String Concatenation :  Concatenates one string with another.   Download

7. Sine series : Prints the sine equivalent of the given number.   Download

8. Cosine series : Prints the cosine equivalent of the given number.   Download

9. Exponential series : Prints the exponent value of the given number.   Download

10. String Reverse : Prints the given string in reverse.   Download

11. String replace : Replaces a string with existing string.   Download

12. File operations : Performs file operations like read and writing to file.   Download

13. Prime numbers : Prime numbers.   Download

14. Pattern search : Searches for a string in a given string.   Download

15. Pascal Triangle : Prints pascal triangle.   Download

16. Hash search : Searching for an element using hashing algorithm.   Download

17. Towers of Hanoi : Program to present towers of Hanoi.   Download

18. Floyd s triangle :  Prints Floyd s triangle.   Download

19. Fibonacci series : Prints Fibonacci numbers up to a given limit.   Download

20. Factorial : Prints the factorial of numbers.   Download

21. Converting decimal number to octal : Converts a given decimal number to its octal number format.   Download

22. Multiplication table : Prints the multiplication table of the given number up to a given limit.   Download

23. ASCII : Returns the ASCII value of the given value.   Download

24. Palindrome number : Returns whether the given number is palindrome number or not.   Download

25. Armstrong numbers : Returns whether the given number is Armstrong number or not.   Download 


NOTE : To run the downloaded C file, install C in the system and paste the downloaded C file in the root directory (for convenience) and open that file from the C application first Compile the program  and then Run.


Java reference VOL-4


File I/O and Streams
You can write data to a file instead of the computer screen. You can write certain data to a file while still putting other data on the screen. Or you may need access to multiple files simultaneously. Or you may want to query the user for input rather than accepting it all on the command line. Or maybe you want to read data out of a file that's in a particular format. In Java all these methods take place as streams. < > Using File I/O streams. The System.out.println() statement we've been using all along is an implementation of Streams.

A program that writes a string to a file


In order to use the Java file classes, we must import the Java input/output package (java.io) in the following manner


import java.io.*;


Inside the main method of our program, we must declare a FileOutputStream object. In this case, we wish to write a string to the file, and so we create a new PrintStream object that takes as its constructor the existing FileOutputStream. Any data we send from PrintStream will now be passed to the FileOutputStream, and ultimately to disk. We then make a call to the println method, passing it a string, and then close the connection.

Source Code

/*
* FileOutput
* Demonstration of FileOutputStream and PrintStream classes
*/


import java.io.*;


class FileOutput
{


public static void main(String args[])
{
FileOutputStream out; // declare a file output object
PrintStream p; // declare a print stream object


try
{
// Create a new file output stream connected to "myfile.txt"
out = new FileOutputStream("myfile.txt");


// Connect print stream to the output stream
p = new PrintStream( out );


p.println ("This is written to a file myFile.txt");


p.close();
}
catch (Exception e)
{
System.err.println ("Error writing to the file myFile.txt");
}
}
}


Program asking  the user for their name and then prints a personalized greeting.


Source Code


import java.io.*;


class PersonalHello {

  public static void main (String args[])
    {
    
      byte name[] = new byte[100];
      int nr_read = 0;

      System.out.println("Your name Please?");
      try {
        nr_read = System.in.read(name);
        System.out.print("Hello ");
        System.out.write(name,0,nr_read);
      }
      catch (IOException e) {
        System.out.print("I did not get your name.");
      }
      
    }
    
}

In code that does any significant input or output you'll want to begin by importing all the various java.io classes. import.java.io.*; Most of the reading and writing you do in Java will be done with bytes. Here we've started with an array of bytes that will hold the user's name.

First we print a query requesting the user's name. Then we read the user's name using the

System.in.read()
method. This method takes a byte array as an argument, and places whatever the user types in that byte array. Then, like before, we print "Hello." Finally we print the user's name.

The program doesn't actually see what the user types until he or she types a carriage return. This gives the user the chance to backspace over and delete any mistakes. Once the return key is pressed, everything in the line is placed in the array.

Often strings aren't enough. A lot of times you'll want to ask the user for a number as input. All user input comes in as strings so we need to convert the string into a number.

The

getNextInteger()
method that will accept an integer from the user. Here it is:

  static int getNextInteger() {


    String line;
  
    DataInputStream in = new DataInputStream(System.in);
    try {
      line = in.readLine();
      int i = Integer.valueOf(line).intValue();
      return i;
    }
    catch (Exception e) {
      return -1;
    }
       
  } // getNextInteger ends here

It's often the case that you want to read not just one number but multiple numbers. Sometimes you may need to read text and numbers on the same line. For this purpose Java provides the StreamTokenizer class.

Sometimes you want to save your output in a  file. To do this we'll need to learn how to write data to a file. 

Source Code


// Write the Fahrenheit to Celsius table in a file


import java.io.*;

class FahrToCelsius  {

  public static void main (String args[]) {

    double fahr, celsius;
    double lower, upper, step;

    lower = 0.0;    // lower limit of temperature table
    upper = 300.0;  // upper limit of temperature table
    step  = 20.0;   // step size

    fahr = lower;
  
    try {

      FileOutputStream fout =  new FileOutputStream("test.out");

      // now to the FileOutputStream into a PrintStream
      PrintStream myOutput = new PrintStream(fout);
  
      while (fahr <= upper) {  // while loop begins here
        celsius = 5.0 * (fahr-32.0) / 9.0;
        myOutput.println(fahr + " " + celsius);
        fahr = fahr + step;
      } // while loop ends here
  
    }  // try ends here
    catch (IOException e) {
      System.out.println("Error: " + e);
      System.exit(1);
    }
  
  } // main ends here

}

There are only three things necessary to write formatted output to a file rather than to the standard output:
  1. Open a FileOutputStream using a line like

FileOutputStream fout =  new FileOutputStream("test.out");


This line initializes the FileOutputStream with the name of the file you want to write into.
  1. Convert the FileOutputStream into a PrintStream using a statement like

PrintStream myOutput = new PrintStream(fout);


The PrintStream is passed the FileOutputStream from step 1.
  1. Instead of using System.out.println()use myOutput.println(). System.outand myOutputare just different instances of the PrintStreamclass. To print to a different PrintStreamwe keep the syntax the same but change the name of the PrintStream.

Now that we know how to write a text file, let's try reading one. The following code accepts a series of file names on the command line and then prints those filenames to the standard output in the order they were listed.

// Imitate the Unix cat utility


import java.io.*;

class cat  {

  public static void main (String args[]) {
  
  String thisLine;

  //Loop across the arguments
  for (int i=0; i < args.length; i++) {

  //Open the file for reading
  try {
    FileInputStream fin =  new FileInputStream(args[i]);

    // now turn the FileInputStream into a DataInputStream
    try {
      DataInputStream myInput = new DataInputStream(fin);
  
      try {
        while ((thisLine = myInput.readLine()) != null) {  // while loop begins here
          System.out.println(thisLine);
        } // while loop ends here
      }
      catch (Exception e) {
       System.out.println("Error: " + e);
      }
    } // end try
    catch (Exception e) {
      System.out.println("Error: " + e);
    }
  
   } // end try
   catch (Exception e) {
    System.out.println("failed to open file " + args[i]);
    System.out.println("Error: " + e);
  }
  } // for end here
  
  } // main ends here

} 

Java Command Line Arguments
This class demonstrates how command line arguments are passed in Java. Arguments are passed as a String array to the main method of a class. The first element (element 0) is the first argument passed not the name of the class.

Source Code
An example that prints in the command line arguments passed into the class when executed.
public class ReadArgs
{
       public static final void main(String args[])
       {
                for (int i=0;i<args.length;++i)
                {
                         System.out.println( args[i] );
                }
        }
} 


Sample Run

With the following command line, the output shown is produced.

java ReadArgs zero one two three


Output:

The following command line arguments were passed:
arg[0]: zero
arg[1]: one
arg[2]: two
arg[3]: three

Java Loops (while, do-while and  for loops)
A loop is a section of code that is executed repeatedly until a stopping condition is met. A typical loop may look like:
 
while there's more data {
  Read a Line of Data
  Do Something with the Data
}
There are many different kinds of loops in Java including while, for, and do while loops. They differ primarily in the stopping conditions used.

For

loops typically iterate a fixed number of times and then exit.
Whileloops iterate continuously until a particular condition is met. You usually do not know in advance how many times a whileloop will loop.

In this case we want to write a loop that will print each of the command line arguments in succession, starting with the first one. We don't know in advance how many arguments there will be, but we can easily find this out before the loop starts using the

args.length
. Therefore we will write this with a forloop. Here's the code:

Source Code


// This is the Hello program in Java

class Hello {


    public static void main (String args[]) {


      int i;


      /* Now let's say hello */

      System.out.print("Hello ");

      for (i=0; i < args.length; i = i++) {

        System.out.print(args[i]);

        System.out.print(" ");

      }

      System.out.println();

  }


}


We begin the code by declaring our variables. In this case we have exactly one variable, the integer i.

i

Then we begin the program by saying "Hello" just like before.

Next comes the

for
loop. The loop begins by initializing the counter variable ito be zero. This happens exactly once at the beginning of the loop. Programming tradition that dates back to Fortran insists that loop indices be named i, j, k, l, mand nin that order.

Next is the test condition. In this case we test that

i
is less than the number of arguments. When ibecomes equal to the number of arguments, (args.length) we exit the loop and go to the first statement after the loop's closing brace. You might think that we should test for ibeing less than or equal to the number of arguments; but remember that we began counting at zero, not one.

Finally we have the increment step,

i++ (i=i+1)
. This is executed at the end of each iteration of the loop. Without this we'd continue to loop forever since iwould always be less than args.length.